CLICK DOORS MEASURING GUIDE
The Ultimate DIY Guide
Measure Twice. Order Once.
Replacing your kitchen doors is the fastest, most cost-effective way to transform your kitchen — if the measurements are right.
This guide is designed to eliminate mistakes, reduce delays and ensure your new doors fit correctly the first time.
Follow each step carefully. Skipping a step increases the risk of ordering incorrectly.
Want the quick version?
If you already feel confident measuring your doors, use our one-page measuring guide for a simple step-by-step checklist.
What You’ll Need
The 3 Golden Rules
Do not skip these.
Measure the door, not the cabinet
Kitchen doors are deliberately smaller than the cabinet opening, usually by around 4 mm, to allow clearance.
If you measure the cabinet, your new doors may not open properly.
Measure the back of the door
The front of most doors has bevels, curves or decorative profiles. The back is flat.
Only the back gives a true edge-to-edge measurement.
Use millimetres only
In kitchens, 1 mm matters. Do not record measurements in centimetres or inches.
Centimetres × 10 = millimetres
71.5 cm = 715 mm
STEP ONE
Draw a Simple Plan
Before measuring anything:
- Draw a rough bird’s-eye sketch of your kitchen.
- Number every door and drawer front: Door 1, Door 2 and so on.
- Use the same numbers on your measuring worksheet.
This prevents missed doors, duplicated measurements and ordering mistakes.
STEP TWO
Measure Height, Width and Thickness
Even identical doors can differ slightly. Cabinets move. Floors aren’t level. Walls aren’t square.
Height
- Measure from top to bottom on the back of the door.
- Measure both the left and right sides.
- If the measurements differ, use the larger measurement.
Width
- Measure from left to right on the back of the door.
- Measure across both the top and bottom.
- If the measurements differ, use the larger measurement.
Thickness
Most doors are between 18 mm and 22 mm thick.
Door thickness can affect hinge compatibility, so do not guess. Contact us before placing your order if your existing doors fall outside this range.
STEP THREE
Determine Door Handing
Stand facing the cabinet and check which side the hinges are fitted.
Left-Hand Door
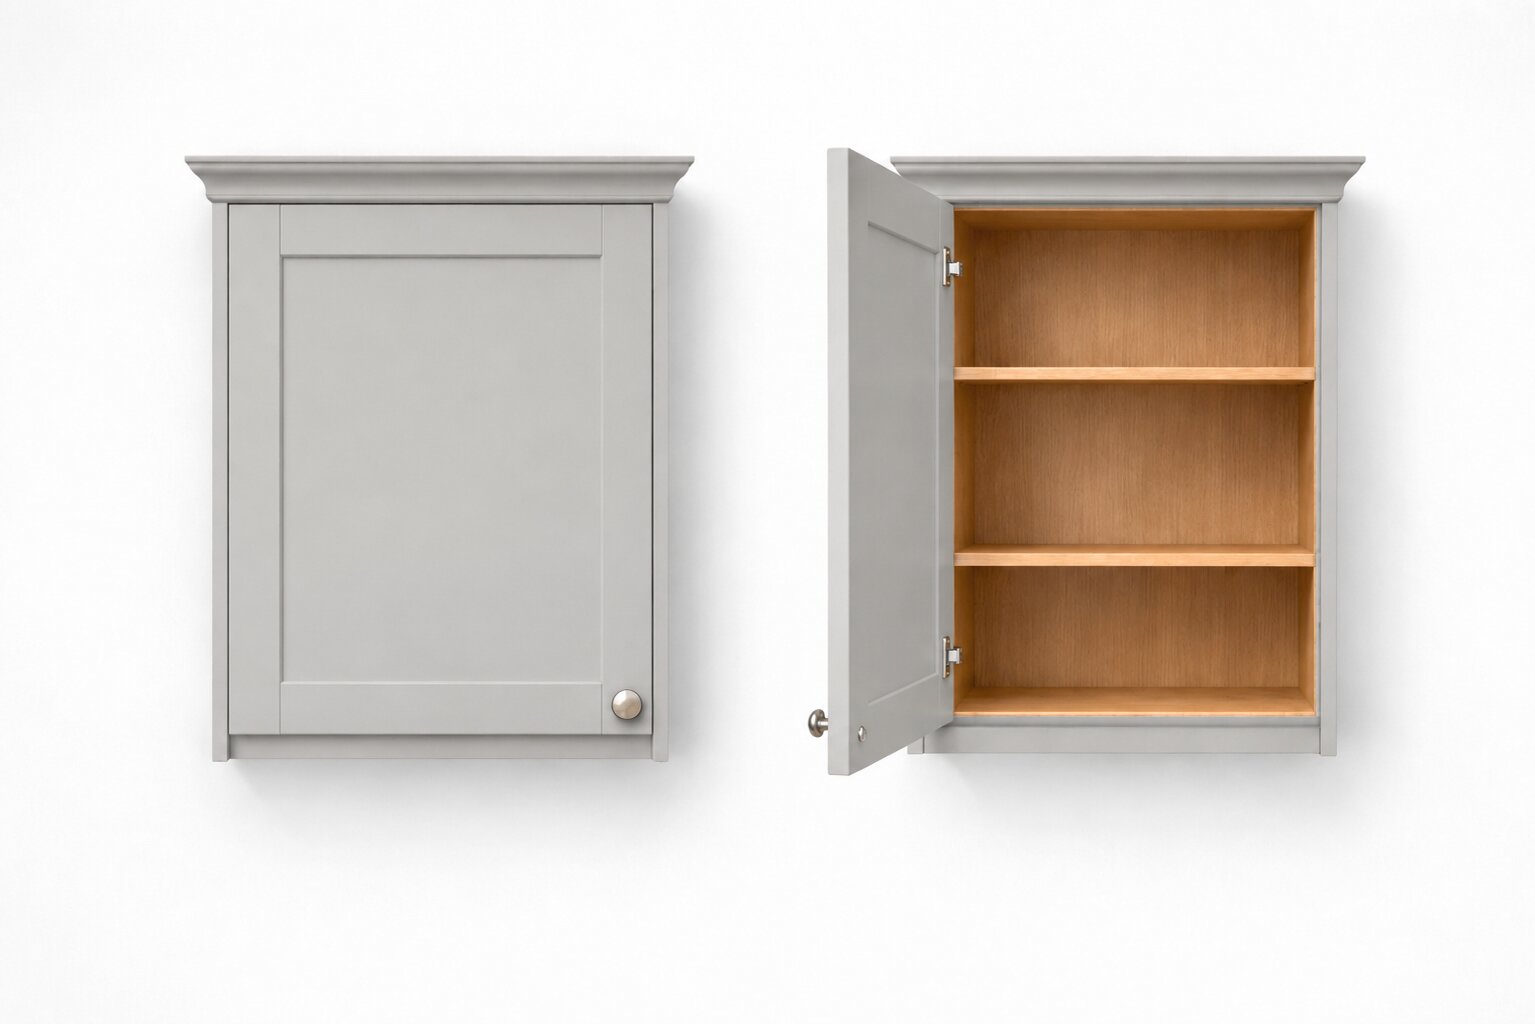
The hinges are on the left and the door opens towards the left.
Right-Hand Door
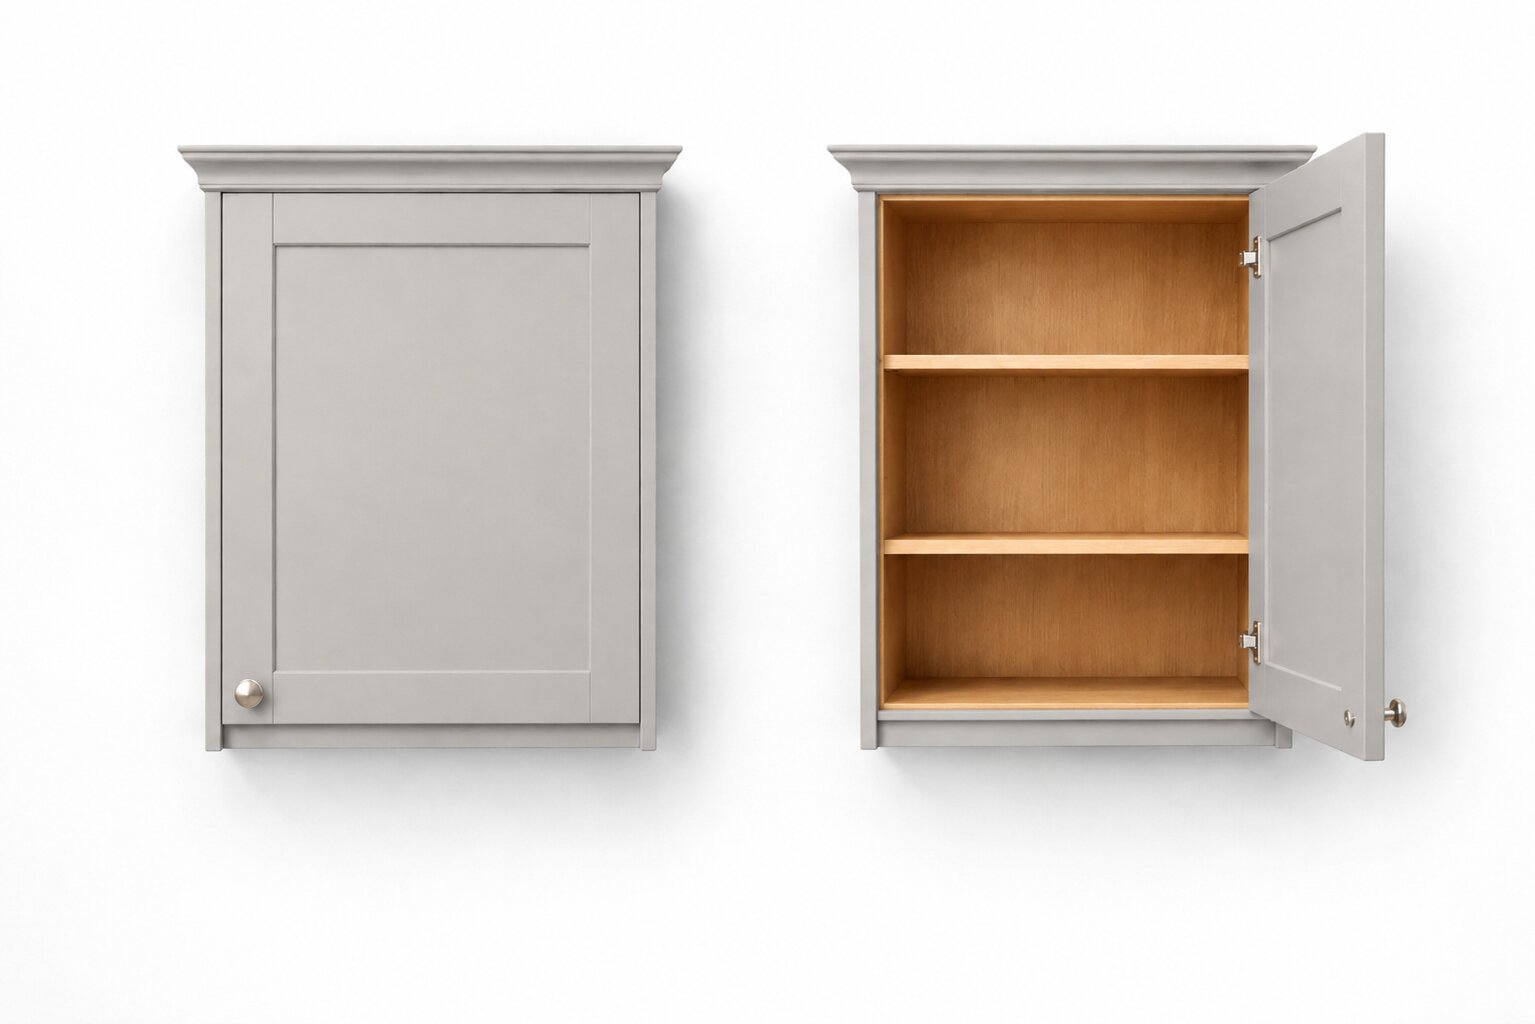
The hinges are on the right and the door opens towards the right.
STEP FOUR — CRITICAL
Measure Hinge-Hole Positions
What We Measure
- All hinge positions are measured to the centre of the 35 mm hinge hole.
How to Measure
- Top hinge: Measure from the top edge of the door down to the centre of the hinge hole.
- Bottom hinge: Measure from the bottom edge of the door up to the centre of the hinge hole.
- Take all measurements on the back of the door.
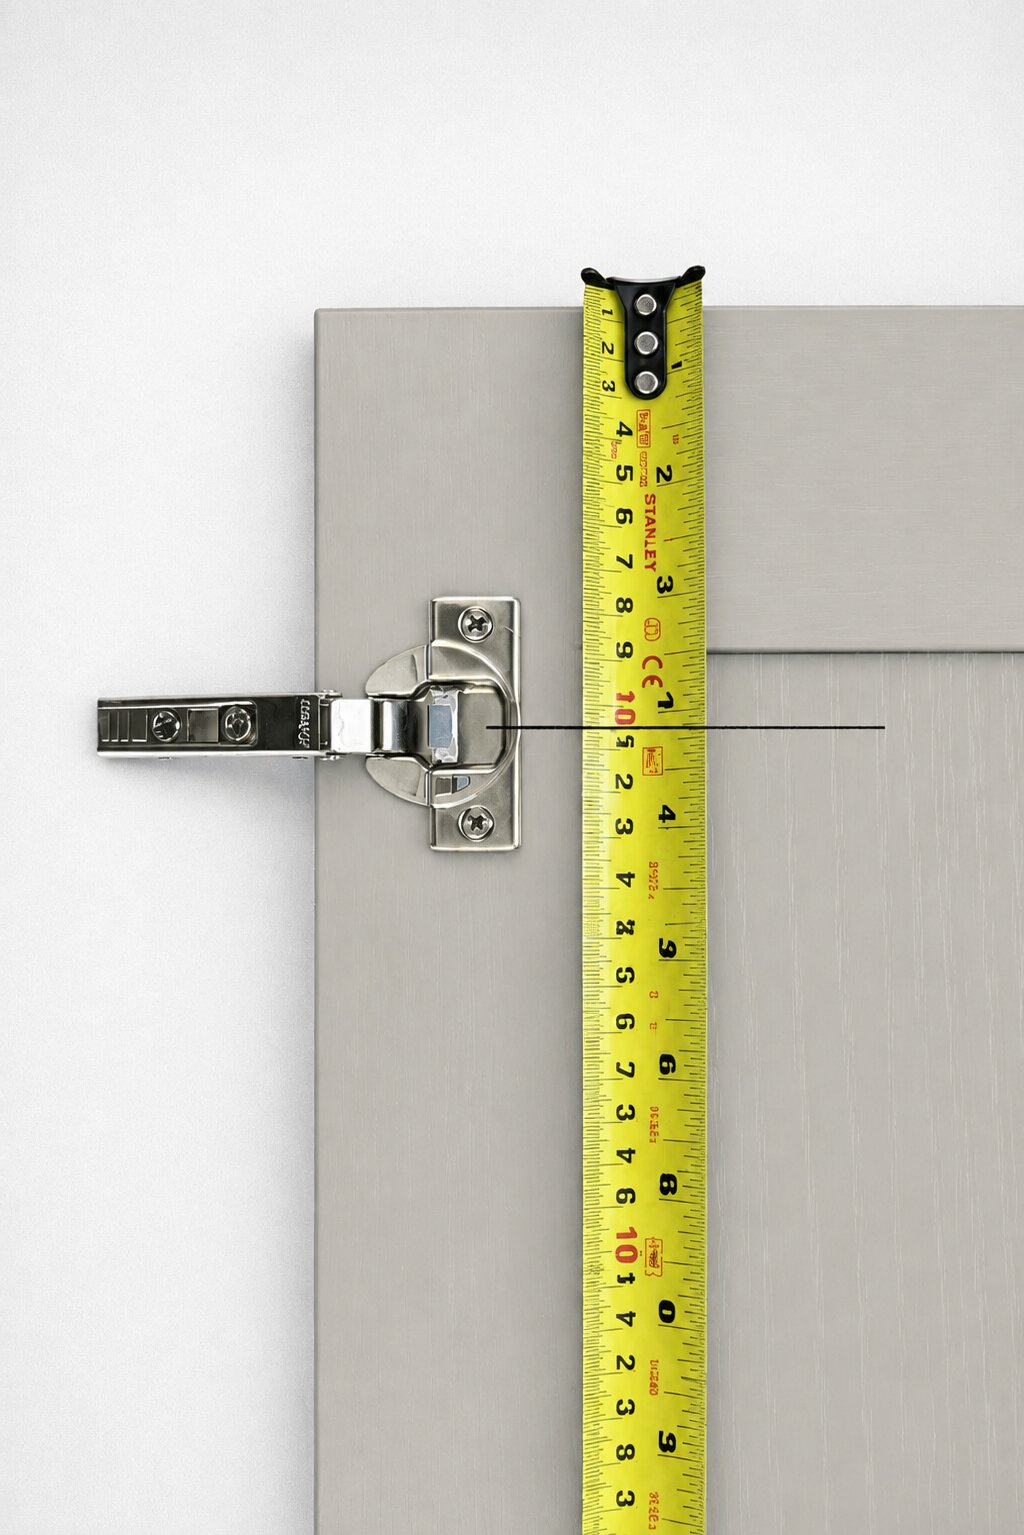
Standard Edge Distance
In most UK kitchens, the hinge-hole centre is 22 mm from the side edge.
If yours is different, which is common with some older IKEA or DIY-brand kitchens, contact us before ordering.
Pro Tip
Lightly mark the centre of the hinge hole with a pencil on the back of the door. Then measure from the top of the door down to the line that you have drawn. Repeat the process for the bottom hinge.
Special and High-Risk Cases
Tall Doors Over 1500 mm
These usually have three or four hinges. Measure the top two hinge holes down from the top edge.
Measure the bottom hinge hole or holes up from the bottom edge to ensure accurate alignment.
Integrated Appliances
Integrated dishwashers, fridges and fridge-freezers may use split doors, such as 70/30 arrangements, and either sliding or fixed-door fixing systems.
Hinge-hole positions are determined by the appliance fixing system, so always check the appliance model or installation guide before ordering.
Corner Units
Bi-fold corner doors are two separate doors.
Measure and record each part individually and clearly label both doors on your worksheet.
Important – Made-to-Order Notice
Pre-drilled doors are manufactured to your exact measurements and cannot be returned if the measurements supplied are incorrect.
If you are unsure about your hinge positions, choose undrilled doors or contact us before placing your order.
Final Checklist
Complete this before ordering.
READY FOR THE NEXT STEP?
Record Your Measurements
Download the printable measuring worksheet or contact us if anything is unclear before placing your order.

